Top 7 Proven Ways to Reduce Tooling Costs in High-Volume Metal Stamping?
Tooling drains profit fast. Deadlines slip. I use seven proven moves to protect margin.
High-volume buyers cut tooling cost1 by aligning design, material, and process early. Teams choose the right die strategy2 and commit volume gates. Suppliers then build simpler tools, run faster lines, and hold stable quality.
So you want clear steps and real math. You also want tight packaging and fast delivery1. I share what works at Prime across ten lines. Then you can scale your part without cost shocks2.
Leverage Bulk Orders to Waive Tooling Fees?
Tooling feels heavy at launch. Cash gets tight1, and projects slow2. I spread cost across planned releases.
Volume commitments1 unlock waivers or amortization. Buyers set gates and release dates. Suppliers then offset tooling while keeping unit prices2 predictable.
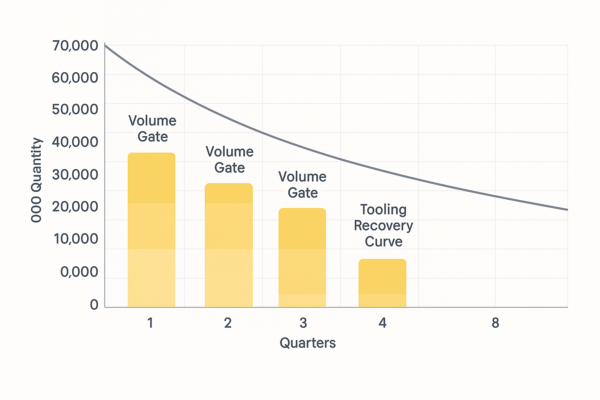
I link tooling recovery1 to firm volume gates2. So the first gate offsets a fair share. Then later gates clear the rest. I align coil bookings with each gate to lock price.
I also match releases to sales seasons. Then cash flow stays smooth1 for your team. And factories avoid rush overtime. As a custom stamping parts supplier in China2, I hold capacity for gate weeks.
Amortization models that finance teams accept
I keep three to five gates during year one. Then I add buffer stock for peak months. I align payment terms with shipment dates. Also, I publish a simple slider for unit price.
| Amortization Model | Typical Threshold | Cash Impact | Risk Level | Best Use Case |
|---|---|---|---|---|
| Full Waiver at MOQ1 | 100k–300k pcs | Strong relief | Medium | Mature demand |
| Step Amortization2 | 3–5 gates | Balanced | Low | New programs |
| Per-Piece Adder | +\$0.01–\$0.05 | Very light | Low | Pilot runs |
However, I avoid vague gates and fuzzy specs. I lock dates, quantities, and tolerance bands1. Then I tie packaging rules to each release. Because clean packaging2 protects finish and prevents claims.
Practical guardrails that keep savings real
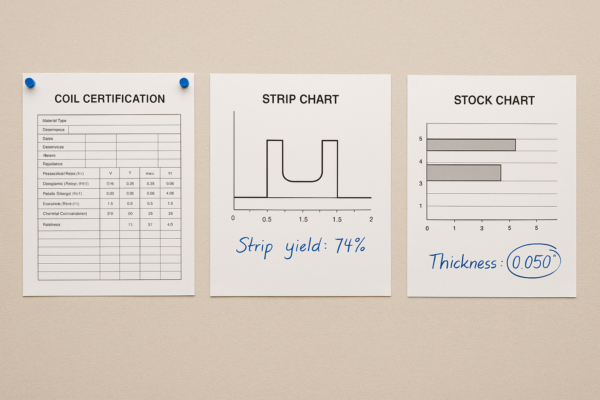
I benchmark with two regional quotes for the same print. Then I confirm material grade1, slit width, and strip yield. I also publish an MOQ for spare punches and buttons2. Therefore the cost model holds for the full year.
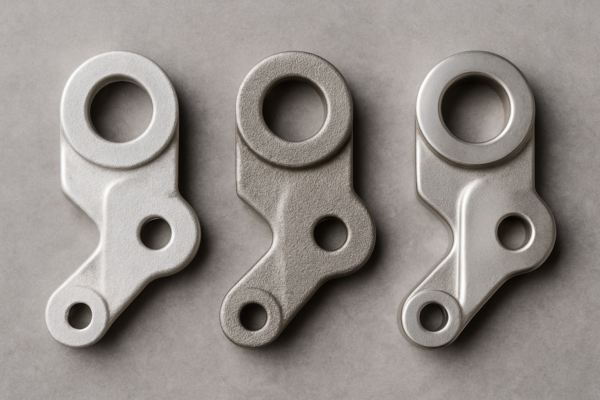
Simplify Part Design to Minimize Die Complexity?
Complex forms add stations and delays. Extra features then raise repair time. I trim features that do not add function.
Teams reduce bends, sharp coins, and extreme radii. Tolerances match true function.1 Dies shrink in size, and parts run faster with less scrap.2
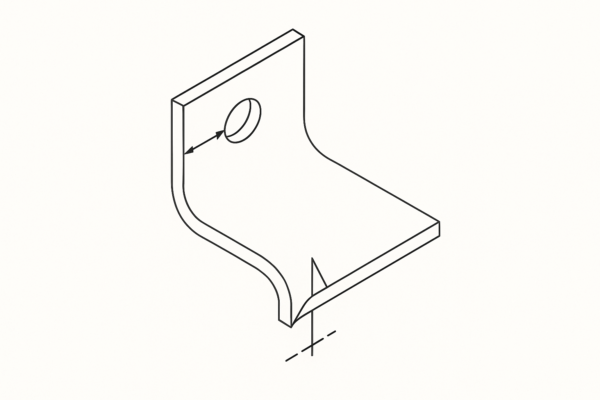
I start with bend radii1 and reliefs. So I set inside radius at least material thickness. Then I align holes to a common datum. I also remove micro features that force EDM time.
Next, I swap sharp corners for small reliefs. Then cracks do not start at edges. I limit pierce-to-bend distances2 when possible. Therefore the strip stays stable across stations.
Use standard stock and standard punches
I standardize thickness to common coil sizes. Then mills quote faster with better prices. I match hole sizes to standard punches1. Also, I pick flats that nest tightly in the strip.
| Design Choice | Cost Effect | Action I Take |
|---|---|---|
| Standard thickness | Lower coil price1 | Match mill stock |
| Fewer bends | Fewer stations2 | Combine forms |
| Wider tolerances | Faster runs | Match function |
| Standard holes | Cheaper spares | Common punches |
| Smooth reliefs | Less cracking | Add corner relief |
I run fast forming checks1 before the RFQ. So I spot splits and springback early. Then I adjust beads and add pilots when needed. I verify if one clean coining pass2 replaces a milling pass.
A short checklist that prevents costly features
- Keep inside radius ≥ material thickness1.
- Keep hole-to-edge2 ≥ 1.5× thickness.
- Align all pierces to one datum.
- Direct burrs away from fit faces.
- Mark cosmetic faces for added protection.
As an ISO-certified metal stamping manufacturer1, I protect launch and lifetime cost2. And I document each change with simple notes and photos. Therefore your team avoids regrinds and missed windows.
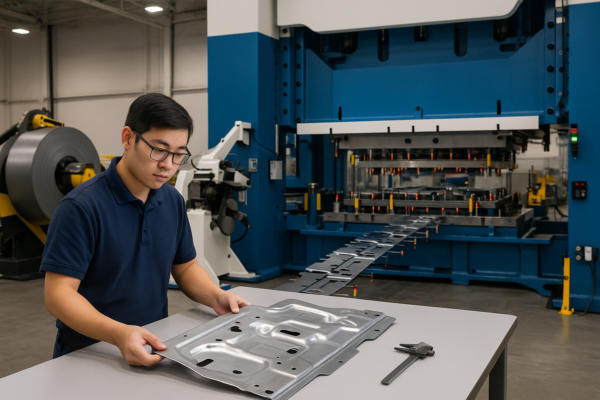
Choose Progressive Dies Over Multiple Stage Dies?
Extra setups add labor and drift1. Parts then vary across shifts. I choose progressive dies2 when volume justifies the spend.
Progressive dies1 form, pierce, and cut in one press. Cycle time2 drops. Repeatability rises. Scrap control and automation also get easier.
I check annual volume, pitch length, and takt. So if output needs speed, I pick a progressive die1. I model strip layout for yield and stability. Then I size the press, feed, and lube based on load.
I add sensors for misfeeds and slug pull. Then the die stops before damage spreads. I plan an in-die counter2 for real hit data. Therefore maintenance follows facts, not guesses.
ROI made simple with three drivers
I make ROI visible with labor, scrap, and speed. Then I compare against a transfer line. I include quick-change inserts for high-wear stations.
| Factor | Progressive Die | Multi-Stage Line | Comment |
|---|---|---|---|
| Cycle time1 | Fast | Slow | One press wins |
| Setup time | Low | High | Fewer changes |
| Repeatability | High | Medium | One strip path |
| Scrap rate2 | Low | Medium | Better nesting |
| Upfront cost | Higher | Lower | Volume driven |
However, I still check the product roadmap1. If variants may change, I use modular inserts2. So I swap a form insert instead of rebuilding the die.
A quick field story with hard numbers
A buyer needed 600k parts yearly. I proposed a progressive die1 with three inserts. Then we cut cycle time2 by 32%. We also reduced scrap by 18%. Therefore unit cost dropped and quality stayed tight.
Partner with Suppliers Offering In-House Tooling?
Handoffs slow feedback and fixes1. Emails pile up, and days slip. I choose suppliers with in-house toolrooms2.
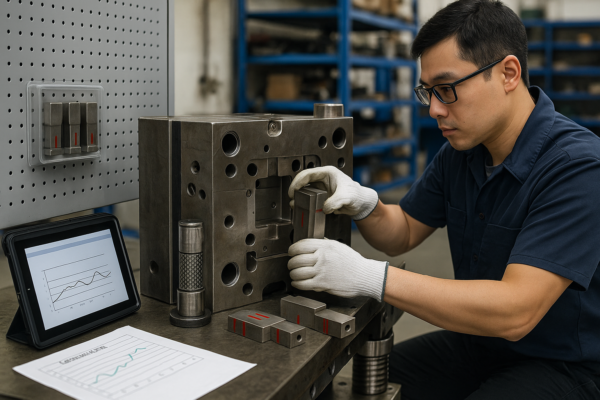
In-house tooling shortens loops. DFM happens faster. Tryouts finish next door. Repairs often complete overnight. Total cost stays under control.
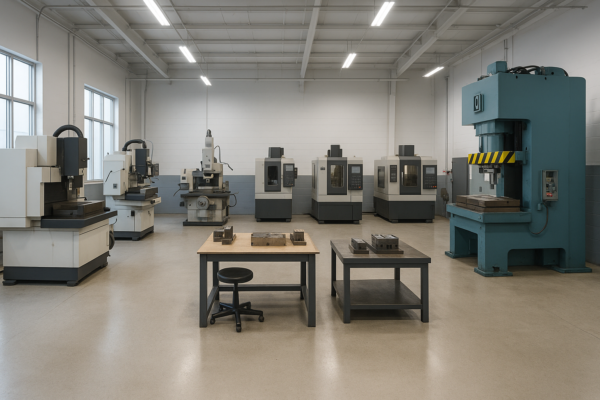
I sit beside the toolmaker during design. So I catch hard-to-grind corners early. I plan stock reliefs to ease fitting. Then I schedule tryouts at the adjacent press.
I align PPAP1 with the tool plan. Then gages, MSA, and control plans stay consistent. As an in-house tooling stamping supplier2, Prime removes friction across teams.
What great in-house support must include
| Capability | Cost Lever | What I Verify |
|---|---|---|
| Wire-EDM + jig grind | Precision inserts1 | Surface finish plan |
| On-press tryout | Faster debug | Real takt match |
| Spare program | Less downtime | Min-max list |
| QC lab and MSA | Stable quality2 | PPAP readiness |
| Packaging cell | Fewer claims | Drop tests |
I connect tool release with packing trials. Then foam-in-place1 or VCI gets locked. I validate carton drop and vibration2. Also, I mark burr direction on travelers.
Why this choice reduces risk and time
- Teams solve problems face to face1.
- Tools get debugged on the real press.
- Spare parts ship without long waits.
- QC aligns gages with true process needs.
- Packaging protects critical faces in transit2.
Therefore launch risk1 falls, and speed rises2. And changes move from talk to action within hours, not weeks.
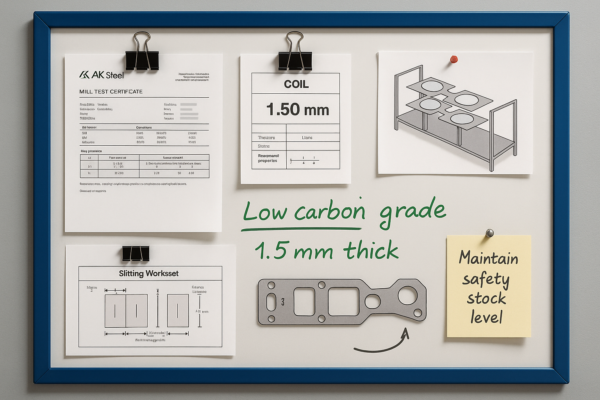
Standardize Material Grade and Thickness Early?
Late material changes stress cost and time. Mills then charge premiums. I lock grade and thickness before steel cut.
Standard grades reduce coil price and lead time.1 Stable thickness boosts strip yield.2 Suppliers plan slitting and storage better.
I review function and environment first. Then I select the simplest grade that meets strength needs. I avoid exotic coatings1 unless tests prove value. Because exotic options often raise MOQ2 and risk.
I align thickness with mill stock1. Then slit plans use full width. I also set burr direction2 by design. Therefore assembly stays smooth after stamping.
Strip yield is the hidden lever
I model the strip with each thickness. So I see how pitch changes yield. I shift features to improve nesting. Then I reduce web waste1 without new risks.
| Option | Coil Availability | Yield Impact | Cost Result |
|---|---|---|---|
| Low-carbon common | High | Good | Low price |
| HSLA common grade | Medium | Good | Balanced |
| Exotic coated | Low | Varies | High price |
| Over-thick spec | High | Poor | Scrap rises |
I keep two mill sources1 per grade. Then price stays fair and stable. I share forecasts for twelve months. Also, I align releases with vessel schedules2.
The total-cost link to downstream processes
We run stamping, welding, and casting under one roof. So we match grades across assemblies. We hold safety stock on critical coils1. As a one-stop industrial hardware supplier2, we protect your line.
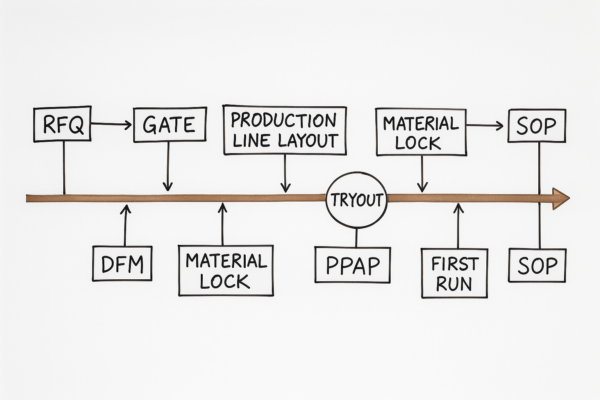
Add DFM and Virtual Forming Early in RFQ?
Late DFM1 causes rework and delays. Shops then rush and miss details. I front-load DFM1 with quick checks and simple tests.
Early simulations2 flag splits, wrinkles, and springback. Teams adjust beads and radii early. Tooling designs stay simpler, and debug time falls.

I start with a 30-minute design review1. Then we map risks by feature. I run light forming simulations2 on tricky bends. Also, I print a PLA tool for hand checks.
I keep the team small and focused. So decisions happen in the room. I log actions in a simple sheet. Then nothing slips through the cracks.
What to check before cutting steel
| DFM Item | Tool | Outcome |
|---|---|---|
| Strain map1 | Quick simulation | Adjust radii |
| Springback2 | Forming calc | Add restrikes |
| Pilot location | Strip layout | Stable feed |
| Lube path | Press audit | No galling |
| Coining need | Sample test | Skip machining |
However, I avoid bloated reports1 that slow people. I capture only what helps decisions. I use short clips and marked screenshots2. Then the team sees issues in seconds.
A short story about speed and clarity
Kevin needed a fast launch1 for a seasonal product. I ran a focused DFM in one day. Then we cut two stations and one coin. Therefore tooling hours2 dropped, and launch stayed on time.
As an industrial hardware accessories1 supplier, we include DFM with every quote. And we respect your print and function. Therefore your RFQ2 moves from idea to parts quickly.
Extend Die Life with Planned Maintenance and Modular Inserts?
Random breakdowns destroy margins. Unplanned stops also hurt delivery. I plan die care like a production process.
Preventive maintenance raises uptime and tool life.1 Modular inserts speed repairs. Sensor data predicts wear and avoids surprises.2
I tie PM to hit counts1, not vague dates. Then crews know when to act. I post the schedule on the press. Also, I stock spare kits2 near the line.
I track lube type1, pressure, and filter age. Then galling2 does not sneak in. I clean slug vents on a fixed cycle. Therefore scrap stays low, and edges stay bright.
Standardize inserts, sensors, and routines
| PM Item | Trigger | Action | Result |
|---|---|---|---|
| Polishing | Every 50k hits | Light polish | Smooth edges |
| Lube check1 | Daily | Verify flow | No galling |
| Slug vents | Weekly | Clean ports | Clear ejection |
| Insert swap | Wear limit | Replace insert | Short downtime |
| Sensor test2 | Shift start | Verify stops | Safety first |
I design high-wear forms1 as inserts. So the team swaps them within minutes. I add feed, misfeed, and part-out sensors2. Then the press stops before damage spreads.
The cultural keys that make PM stick
- Leaders walk lines and check logs.
- Teams celebrate zero unplanned stops1.
- Spare kits stay complete and ready.
- Data stays visible near the press.
- Lessons move into new die designs2.
As a progressive die stamping1 supplier, we run the same PM logic across cells. Therefore total cost stays low2 across product families.
Put It Together With a Clear Playbook?
Seven moves work best as one plan. Buyers want speed, cost control, and stable quality1. I connect each move with a simple playbook2.
Define volume gates, simplify design, and choose the right die. Standardize material, run early DFM, and lock PM. Keep all functions aligned in one shared plan.
First, I publish a one-page timeline with owners. Then everyone sees the same dates. I keep scope small and clear. Also, I track risks and blockers1 each week.
Second, I align packaging with tooling tryouts. Then surfaces stay safe from day one. I run basic drop and vibration checks2. Therefore we avoid late drama and shipping claims.
Third, I close the loop with hit-based PM1. Then inserts do not die in silence. I show live counters2 and next service windows. Therefore uptime stays high throughout the year.
A compact RACI that avoids confusion
| Phase | Design | Tooling | Production | QC | Logistics | Buyer |
|---|---|---|---|---|---|---|
| DFM | R | A | C | C | I | A |
| Material lock1 | C | C | I | A | I | R |
| Strip layout | A | R | C | C | I | I |
| Tryout | C | R | A | A | I | I |
| PPAP2 | C | C | C | A | I | R |
| PM setup | I | R | A | C | I | I |
Here, R means Responsible1. A means Accountable2. C means Consulted. I means Informed. The table keeps roles simple and visible.
FAQs
Q1: Can you waive tooling1 if I commit volume?
Yes, we structure gates and amortization. We propose clear MOQs and release dates. Then we align coil bookings and press time.
Q2: How fast can you launch a new stamping part2?
We launch in six to ten weeks for typical parts. We cut time with in-house tooling1 and on-press tryouts. We keep QC and packaging aligned.
Q3: How do you control quality for tight tolerances?
We set CPk goals1 and hourly checks. We use go/no-go gages and optical methods. We also run PPAP with full MSA data.
Q4: What certifications does Prime hold?
We hold ISO quality certifications2 across lines. We apply the same standards to casting, welding, and fasteners. We audit suppliers and labs as well.
Q5: Can you support CNC, casting, and plastics along with stamping?
Yes, we provide one-stop services. We handle CNC parts precision machining1, ISO-certified casting parts2, and plastic parts. We deliver matched assemblies.
Q6: How do you pack parts with sensitive surfaces?
We use VCI, foam-in-place, and trays. We run drop and vibration tests. We document burr direction and stack patterns.
Q7: Do you serve global markets with stable lead times1?
Yes, we ship to North America, Europe, the Middle East, and Australia. We plan vessels weekly. We provide ASN tracking and buffer stock.
Q8: What makes Prime different from trading companies?
We are a factory with ten production lines. We build dies in-house and run high-volume presses. We commit to fast delivery2 and clear communication.
Q9: Do you offer custom labels and logo packaging1?
Yes, we add branded cartons and labels. We follow strict packaging rules. We protect finish with VCI and foam.
Q10: Can you quote progressive and transfer options2 side by side?
Yes, we model both paths. We share cycle time, scrap, tooling hours, and strip yield. Then you choose with full clarity.

Why work with Prime today
We founded Prime in 1993. We run ten production lines in China. We focus on B2B wholesale programs. We offer custom stamping parts1, CNC machining2, welding parts, casting parts, fasteners, and plastic parts. We keep ISO-certified systems and strong QC labs. We move fast on tooling and launches. We protect parts with strict packaging rules. We support North America, Europe, the Middle East, Australia, and global markets. We communicate clearly and act quickly. We price competitively and protect your timeline.
Get a free DFM review, a firm schedule, and a clear quote now.
Website: https://primecustomparts.com/
Email: [email protected]
I am ready to review prints, tolerances, and volumes today. Send your RFQ, and we will reply fast with a plan, a price, and a launch date.
Conclusion
Use volume gates, simpler designs, progressive dies, in-house tooling, standard materials, early DFM, and planned PM to cut tooling cost.
-
Explore this link to understand how custom stamping parts can enhance production efficiency and reduce costs. ↩ ↩ ↩ ↩ ↩ ↩ ↩ ↩ ↩ ↩ ↩ ↩ ↩ ↩ ↩ ↩ ↩ ↩ ↩ ↩ ↩ ↩ ↩ ↩ ↩ ↩ ↩ ↩ ↩ ↩ ↩ ↩ ↩ ↩ ↩ ↩ ↩ ↩ ↩ ↩ ↩ ↩ ↩ ↩ ↩ ↩ ↩ ↩ ↩ ↩ ↩ ↩ ↩ ↩ ↩ ↩ ↩ ↩ ↩ ↩
-
Discover the advantages of CNC machining and how it can elevate your production capabilities. ↩ ↩ ↩ ↩ ↩ ↩ ↩ ↩ ↩ ↩ ↩ ↩ ↩ ↩ ↩ ↩ ↩ ↩ ↩ ↩ ↩ ↩ ↩ ↩ ↩ ↩ ↩ ↩ ↩ ↩ ↩ ↩ ↩ ↩ ↩ ↩ ↩ ↩ ↩ ↩ ↩ ↩ ↩ ↩ ↩ ↩ ↩ ↩ ↩ ↩ ↩ ↩ ↩ ↩ ↩ ↩