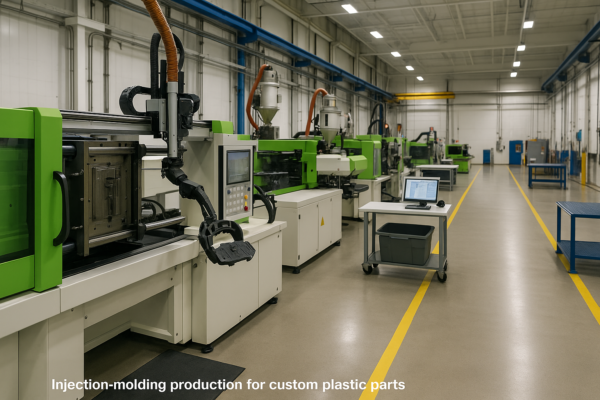
Top Design Optimization Strategies to Reduce Costs in Custom Plastic Parts?
Budgets keep shrinking, and resin prices1 rise. I solve that with smarter design2. So costs drop without quality risk.
Design choices decide most costs. I reduce plastic part cost by early DFM1, balanced walls, integrated features, and fast validation. These actions cut tooling, cycle time, labor, scrap, and freight. Results stay stable under ISO control2.
You want steps that work now. I share the same playbook I use at Prime1 since 1993. Then you can act fast and win your season2.
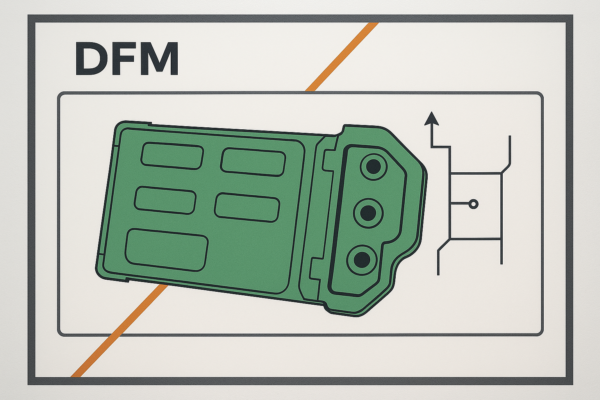
Design for Manufacturability (DFM): Simplifying Features to Reduce Tooling Complexity?
Complex features1 slow molds and raise price. I remove, merge, or round features first. Then I plan gating and ejection2 early.
DFM lowers cost by easing tool build1 and operation. I simplify ribs, bosses, and undercuts. I standardize inserts and actions. I align parting lines for flash control. Cycle time drops, and stability improves.
Dive Deeper: practical DFM moves that protect budgets
Start with function, not geometry
I challenge every slot, window, and boss. I ask, “What job does this feature do?” Then I remove decorative cuts and merge overlapping shapes. I add radii to sharp corners. The tool lasts longer, and surfaces look better. I replace side actions with living hinges1 or snaps when loads allow. So I drop sliders and shorten build time2.
Standardize components and steels
I pick catalog ejector pins1, gates, springs, and lifters. Spare parts arrive fast, and maintenance stays simple. I choose steels by volume and resin. I use aluminum or P20 for pilots. I use H132 for long life or abrasive resins. I design cooling while I design geometry. So channels reach ribs and bosses, not just plates.
Align parting lines and protect shut-offs
I place the parting line on natural edges1. Flash shrinks, and polishing time falls. I keep engraving shallow and away from shut-offs. I add robust leader pins2 to maintain alignment. Setups finish faster, and changeovers stay tight.
| DFM choice | Cost impact | Practical note |
|---|---|---|
| Add 0.5–1.0 mm radii | Lower wear1 | Eases flow and ejection |
| Replace slider with snap | Lower tool and cycle | Needs draft and fillet |
| Standardize ejectors | Lower spare cost | Use common sizes |
| Align parting line | Faster build2 | Cleaner cosmetics |
| Optimize cooling | Shorter cycle | Guard against warp |
I used this on a handheld enclosure. I removed one slider and added a snap boss. I merged two deep ribs and added fillets. Tooling cost fell 14%, and cycle time dropped 11%. First-pass yield rose, and the schedule held.
Wall Thickness and Geometry: Minimizing Material Usage Without Sacrificing Strength?
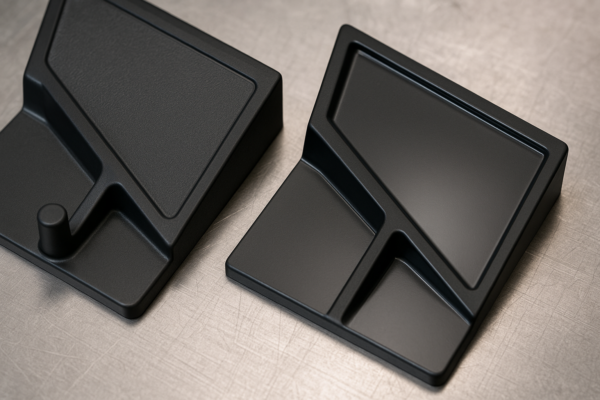
Thick walls1 add weight and sink. Thin walls warp when geometry ignores flow. I tune walls with ribs2, fillets, and coring.
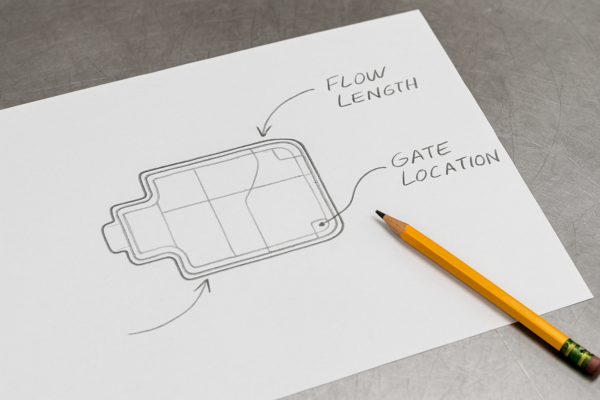
Uniform walls use less resin and cool faster.1 Ribs deliver stiffness without mass. Smooth transitions reduce stress and blush.2 Proper gates manage flow length. So strength holds while weight and time drop.
Dive Deeper: the playbook for strong and light walls
Set wall targets by resin
I start at 2.0–2.5 mm for ABS1. I allow slightly thicker walls for PP. I keep PC near 2.0–3.0 mm for optics and strength. I avoid sudden wall jumps. I taper transitions2 over distance. So sinks and stresses stay low.
Use ribs, not mass
I size ribs at 40–60% of wall. I add root fillets1 near 0.25× wall. I space ribs to avoid print-through on Class-A faces. I core bosses and tie them back with ribs. I support screw bosses with pads and gussets. So screw torque2 stays safe without thick islands.
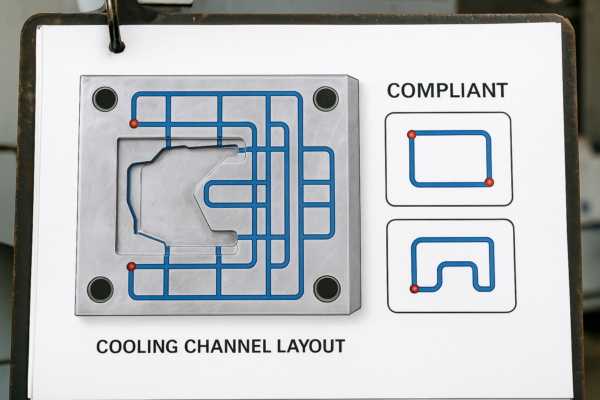
Control flow, venting, and cooling
I gate near thicker features to shorten flow. I move knit lines away from screws and windows. I vent generously at knit lines and ends. I design cooling around heavy zones1. I add baffles and bubblers for deep pockets2. I avoid isolated mass by coring. Then parts eject clean, and cycles shrink.
| Feature | Preferred range | Why it saves cost |
|---|---|---|
| Wall thickness1 | Uniform, resin-based | Less resin and faster cooling |
| Rib thickness | 40–60% of wall | Strength without sink |
| Fillet radius | 0.5–1× wall | Lower stress and blush |
| Boss design | Cored with ribs | Stable torque and cooling |
| Draft angle2 | 1–2° typical | Easy release and fewer marks |
I tuned a Siemens-compatible cover1 with this method. Average wall dropped 0.3 mm. Hidden ribs kept stiffness safe. Weight fell 9%, and cycle time improved 12%. Freight costs also dropped, and packaging density2 stayed high.
Reducing Secondary Operations: Snap-Fit, Draft Angles, and Built-In Assembly Features?
Every extra step adds time and risk. I design features that assemble themselves1. Then I keep draft generous2 for smooth release.
Snap-fits replace screws1 in many housings. Molded logos replace labels. Guides and stops self-locate parts. Correct draft reduces sticking2 and rework. So lines move faster with fewer tools and fewer touches.
Dive Deeper: integrate more, handle less
Map the assembly and count touches
I walk the process and time each motion. Each screw adds cost. Each label adds rework risk. I design cantilever snaps1 with safe strain and clear access. I add lead-ins, stops, and poka-yoke keys2. Operators then assemble by feel, not struggle.
Draft rules and ejection care
I use 1–2° draft1 on most walls. I add more draft1 on textured faces. Parts leave tools cleanly, and pins work lightly. I place lifters away from cosmetic faces. I tune snap pull force2 with printed jigs before steel freeze. Scrap falls because witness marks shrink.
Replace steps with molded features
I mold logos and part numbers. I add cable clips1, strain-relief loops, and PCB supports. I mold gaskets as TPE overmold2 when it fits. I build nut pockets instead of heat-set inserts when service allows. I design molded holes instead of post-drilling.
| Old step | New design choice | Result |
|---|---|---|
| Two screws | Opposed snap-fits1 | Faster assembly, less metal |
| Sticker label | Molded logo | No peel or skew |
| Solvent weld | Tongue-and-groove latch2 | Cleaner line, safer work |
| Heat-set insert | Boss + nut pocket | Fewer tools, easy service |
| Post-drilling | Molded hole | Better accuracy, zero debris |
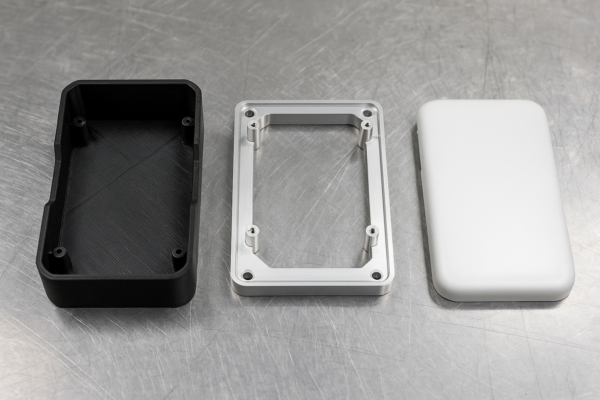
I keep service in mind. When disassembly matters, I use fewer screw sizes and shorter lengths. I pair plastics with metal where needed. Prime also supplies stamping parts, CNC parts precision machining1, casting parts, welding parts, and fasteners. One team aligns tolerances across all items. That one-stop plan2 saves emails and weeks.
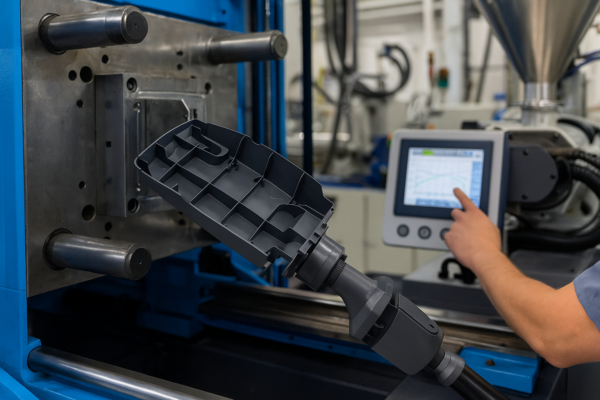
Prototyping and Simulation: Identifying Cost-Saving Design Adjustments Early?
Data beats hope1, and speed beats delay2. I test designs before steel. Then I change once and move.
3D prints check feel and reach. Machined resin parts test snaps and torque. Soft tools confirm gates and ejection. Mold-flow1 predicts fill, weld lines, and warp. Cooling simulation2 shapes cycle time. These checks prevent late, expensive changes.
Dive Deeper: test fast, fix once
Pick the right prototype for the question
I print housings to prove ergonomics and access. I machine parts from the real resin to test snaps and creep. I build a soft tool when I need true gates and ejection. Our in-house CNC lines cut these tools fast. Confidentiality stays tight, and timing stays firm.
Mold-flow and cooling payoffs
I run fill, pack, and warp studies. I move gates to balance pressure1 and shift knit lines off bosses. I trim rib thickness and adjust draft where maps show stress. I simulate cooling2 to remove hot spots. I place baffles and bubblers to reach deep ribs. Cycle time drops without new issues.
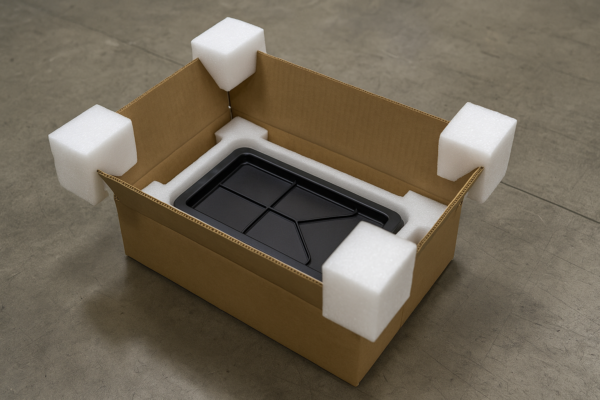
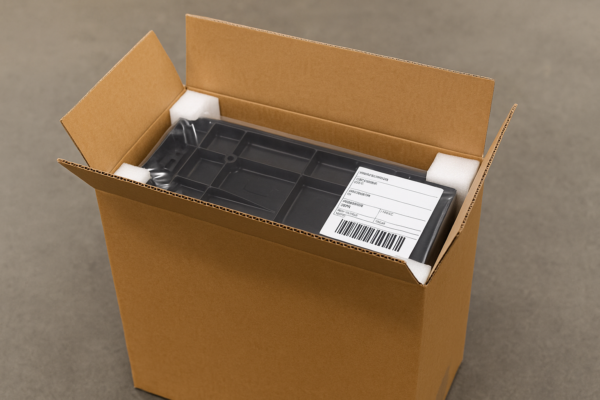
Validate packaging early
I build trays and cartons with real parts. I run drop tests1 at agreed heights. Snaps and windows survive because cutouts block direct load. Pallet patterns fit your warehouse. Barcodes scan cleanly on arrival. Claims drop, and repeat orders rise.
| Goal | Method | Why it saves cost |
|---|---|---|
| Fit and ergonomics | 3D printed set1 | Cheap changes and fast checks |
| Snap behavior | Machined resin parts | Realistic flex and fatigue |
| Gate and weld lines | Mold-flow analysis2 | Fewer cosmetic defects |
| Cooling time | Cooling simulation | Short cycles and stable warp |
| Transit safety | Packed pilot samples | Fewer returns and claims |
I once saw swirl marks1 in flow maps on a control cover. I moved the gate and added a flow leader rib2. The marks vanished in the next run. The soft tool tweak cost little. The saved time was huge. The launch met the selling window, and freight stayed standard.
FAQs
What wall thickness should I choose for common resins?
I start at 2.0–2.5 mm for ABS1. I allow slightly more for PP. I keep PC2 near 2.0–3.0 mm. I hold walls uniform.
How exactly does DFM reduce tooling cost?
DFM1 removes undercuts and sharp corners. It standardizes ejectors and inserts2. It aligns parting lines with easy ejection. Tooling builds faster and lasts longer.
When should I use snaps instead of screws?
I use snaps when loads are light and access is clear. I test pull force1 early. I add draft and fillets2 for smooth action.
Can Prime manage plastic with metal in one build?
Yes. We run plastics and metals under one plan. Our team aligns CNC parts precision machining1 with plastics. Tolerances and finishes stay consistent.
Do prototypes really save money?
Yes. Prototypes1 catch fit, flow, and warp issues. They direct gate choices and cooling design2. They prevent late, costly steel changes.
What packaging protects fragile snaps or screens?
I use foam trays with blocked cutouts1. I add corner guards2 and clear labels. I test drops with packed samples. Damage rates fall fast.
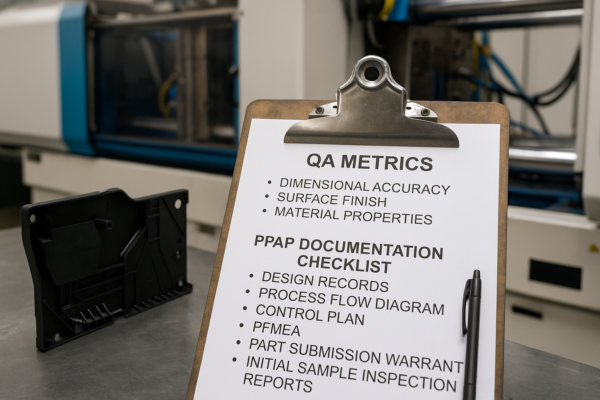
Why choose an ISO-certified manufacturer?
ISO systems keep processes repeatable. Prime holds ISO certification1 and runs ten lines. We deliver fast with stable quality2. Audits go smoothly.
How do I compare quotes from suppliers?
I request DFM notes, cycle time1, and resin grade. I check tool steel, cavity count, and cooling plan2. I compare packaging and QA plans, not price alone.
Do you support related categories beyond plastics?
Yes. We are a custom stamping parts1 supplier and an ISO-certified casting parts2 manufacturer. We also offer welding parts and fasteners.
Which SEO terms help me find the right partner?
Search for “custom plastic parts supplier in China1” and “ISO-certified plastic injection molding factory2.” Also try “custom injection mold tooling manufacturer.”
Conclusion
Smart DFM1, tuned walls, integrated features, and early validation2 cut costs fast while global quality and delivery stay stable.
Contact Prime now for a free expert review, quote, and custom plan. We deliver fast and keep quality stable under ISO control. Send an inquiry on our website today. As a B2B wholesale factory with ten production lines, we ship on time worldwide. We also supply stamping parts, CNC parts, casting parts, welding parts, fasteners, and plastic parts. Choose a custom plastic parts supplier in China that speaks clearly and executes quickly. Prime stands ready to help now.
SEO terms for buyers: custom plastic parts supplier in China; ISO-certified plastic injection molding factory; custom injection mold tooling manufacturer; CNC parts precision machining; custom stamping parts supplier; ISO-certified casting parts manufacturer.
-
Explore this link to understand how Smart DFM can streamline your manufacturing process and significantly cut costs. ↩ ↩ ↩ ↩ ↩ ↩ ↩ ↩ ↩ ↩ ↩ ↩ ↩ ↩ ↩ ↩ ↩ ↩ ↩ ↩ ↩ ↩ ↩ ↩ ↩ ↩ ↩ ↩ ↩ ↩ ↩ ↩ ↩ ↩ ↩ ↩ ↩ ↩ ↩ ↩ ↩
-
Discover the benefits of early validation in product development and how it can lead to cost savings and efficiency. ↩ ↩ ↩ ↩ ↩ ↩ ↩ ↩ ↩ ↩ ↩ ↩ ↩ ↩ ↩ ↩ ↩ ↩ ↩ ↩ ↩ ↩ ↩ ↩ ↩ ↩ ↩ ↩ ↩ ↩ ↩ ↩ ↩ ↩ ↩ ↩ ↩