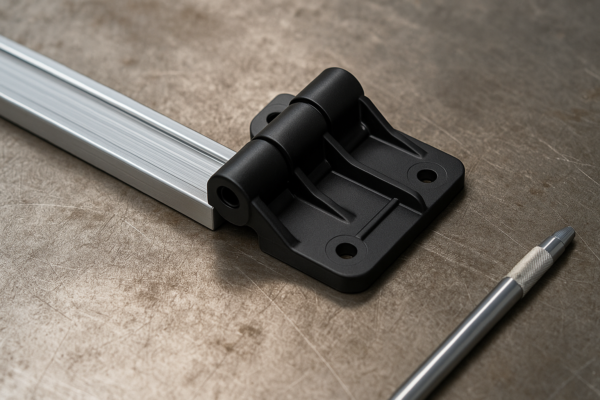
Metal Stamping Design Guide: 10 Critical Factors for Performance and Cost Efficiency
If you want better stamped parts, faster production, and lower costs, you need more than just a tool—it starts with the right Metal Stamping Design Guide.
This Metal Stamping Design Guide walks you through 10 expert-level tips to help you design smarter, avoid rework, and hit your cost targets.
Let’s explain it with a real conversation between Kevin (a U.S. mechanical parts buyer) and Leo (our senior stamping engineer at Prime).
What Is Design for Manufacturability (DFM) in Metal Stamping?
Kevin:
I’ve heard about DFM. But how does it apply in a real Metal Stamping Design Guide?
Leo:
In stamping, DFM means designing the part to match tooling, forming limits, press size, and material behavior. Our Metal Stamping Design Guide explains how small changes at the design stage prevent major problems during production.
Why Should I Optimize My Stamped Part Design?
Kevin:
Can a good Metal Stamping Design Guide really change the cost?
Leo:
Absolutely. A strong Metal Stamping Design Guide helps reduce press time, eliminate unnecessary features, and reduce tooling stress. Design defines over 70% of the part’s total cost.
| Area Improved With Design Guide | Typical Savings Range |
|---|---|
| Material use | 5–15% |
| Tooling cost | 10–30% |
| Scrap reduction | Up to 35% |
| Cycle time | 10–25% faster |
| Fewer secondary ops | 1–3 steps eliminated |
10 Critical Design Factors from Our Metal Stamping Design Guide
1. Material Selection

Leo:
Your Metal Stamping Design Guide starts here. Don’t pick material based only on strength. Think formability, thickness, price, and springback.
Design Guide Tips:
- Choose material with enough ductility
- Match yield strength to forming depth
- Don’t over-spec unless it adds function
- Simulate complex forms before finalizing
- Ask about global lead times
2. Part Geometry and Complexity
Kevin:
We’ve got some deep slots and curved features. Are those risky?
Leo:
In any good Metal Stamping Design Guide, complex shapes are red flags. They require more stations and increase rejection risk.
Design Guidance:
- Keep shapes symmetrical
- Avoid deep cuts near bends
- Reduce sharp angles or narrow channels
- Ensure constant wall thickness
3. Tolerancing Strategy
Leo:
Tolerances are key. A Metal Stamping Design Guide helps separate what’s critical from what’s not.
| Process | Standard Tolerance |
|---|---|
| Progressive Die | ±0.05–0.13 mm |
| Fine Blanking | ±0.013–0.025 mm |
| Deep Draw | ±0.13–0.25 mm |
Don’t spend money on tight tolerances that don’t add value.
4. Bend Design and Springback Compensation
Kevin:
Our stainless parts are off-angle after forming.
Leo:
Classic springback. Our Metal Stamping Design Guide includes formulas and bending simulations for this.
Apply:
- Bend radius = 1–1.5× material thickness
- Use bend reliefs and grain direction checks
- Add forming analysis early
5. Hole and Slot Design
Leo:
A Metal Stamping Design Guide always includes hole and slot tips. Bad placement leads to broken punches and warped parts.
Checklist:
- Hole Ø ≥ material thickness
- Distance from edge ≥ 2× thickness
- Radiused corners on all slots
- Avoid placing holes near bends
6. Corner and Edge Treatment
Leo:
Sharp corners cause more damage than people realize. Follow our Metal Stamping Design Guide to round, hem, or flange edges.
- Internal corner radius ≥ 0.5× thickness
- Hemmed edges for safety
- Post-processing if sharp edges must remain visible
7. Drawn Features
Leo:
Drawing? Very tricky. Our Metal Stamping Design Guide includes success limits for drawn cups, housings, and boxes.
Basic Guidelines:
- Depth ≤ 2× diameter
- Radius ≥ 6× thickness
- Draft angle for easy ejection
- Blank holder usage to prevent wrinkling
8. Assembly-Ready Design
Kevin:
We want to weld and rivet these on the line.
Leo:
Our Metal Stamping Design Guide includes built-in design for assembly strategies.
- Add tabs for alignment
- Use uniform fastener holes
- Provide access clearance
- Include features for robotic handling
9. Secondary Operation Reduction
Leo:
Want to save cost? Eliminate post-processes. Our Metal Stamping Design Guide recommends:
- In-die tapping
- Better edge quality
- Features that reduce welding or drilling
- Multi-functional flanges or clips
10. Cost Optimization

Leo:
The best Metal Stamping Design Guide ends with cost. You’re not just designing a part—you’re designing a profitable process.
Optimize:
- Nest parts to minimize waste
- Avoid exotic materials or rare gauges
- Limit the number of die stations
- Combine similar functions into fewer features
Summary Checklist from Our Metal Stamping Design Guide
✅ Material chosen with forming in mind
✅ Geometry simplified and tool-friendly
✅ Tolerances optimized for the process
✅ All holes, bends, and slots checked
✅ Springback factored into bends
✅ No unnecessary second ops
✅ Designed for assembly
✅ Aligned with our Metal Stamping Design Guide standards
Case Study: Using the Metal Stamping Design Guide to Cut Costs by 32%
Before:
- 35% scrap
- 3 post-processing steps
- 12 die stations
- Long cycle time
After Applying Prime’s Metal Stamping Design Guide:
- Scrap dropped to 20%
- Stations reduced to 8
- In-die threading added
- Rejection rate cut in half
- Total cost savings: 32%
When to Involve Your Metal Stamping Design Guide Partner?
| Project Stage | What Our Metal Stamping Design Guide Offers |
|---|---|
| Concept phase | Material advice, feature audit |
| CAD development | Forming simulation, cost-effective layout |
| Drawing review | Tolerance and tool impact feedback |
| Prototype stage | Sample tooling or pilot run evaluation |
Contact Prime for a Metal Stamping Design Guide Review
📧 Email: [email protected]
🌐 Website: https://primecustomparts.com
Ready to apply this Metal Stamping Design Guide to your next part?
✅ Free expert review
✅ CAD feedback within 24 hours
✅ Global delivery and full DFM support
Conclusion
The right Metal Stamping Design Guide doesn’t just reduce cost—it builds quality into every part you produce.
Let Prime help you optimize, simplify, and succeed from day one.