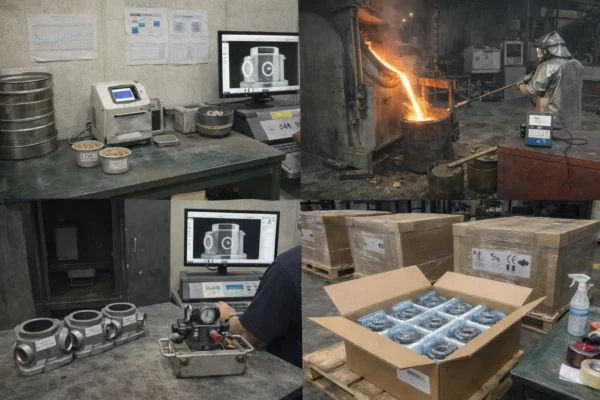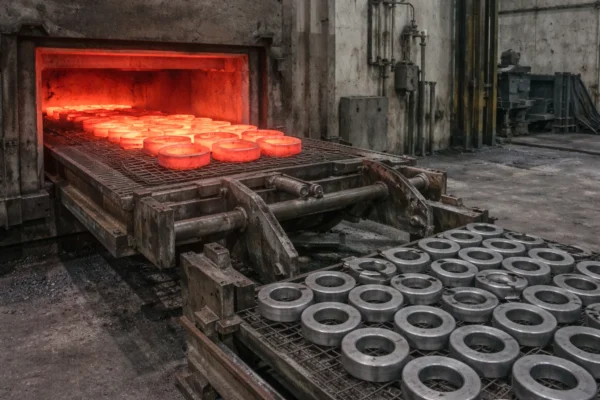
Costs creep in fast. Scrap grows. Setups drag. Rework piles up. I have seen this on real floors. The fix is simple: focus on design, metal, batches, and prevention.
Cut stamping costs by fixing the drawing early, picking metal by total cost of use, right-sizing batches with SMED, and preventing defects in-process. These four levers lower spend without hurting quality.

I run projects like a shop foreman who must ship on time. I walk the strip layout, count handling steps, and match each gauge to tool life. I keep language plain and decisions visible. When a standard helps, I anchor to the official pages for ISO 9001, IATF 16949, and the lean basics behind SMED and OEE. When a buyer asks for pictures or examples, I send them to our own Metal Stamping Parts hub and the photo-rich stamping parts page.
Understanding Where Money Hides in Custom Metal Stamping
I use one map for buyers, engineers, and operators. It shows where money leaks, where it multiplies, and where simple actions reverse it. If you want a quick run-through before an RFQ, read the materials trade-offs in our precision guide and compare process paths in the progressive vs. deep draw explainer. Then we can talk in numbers, not opinions.
| Cost Lever | What Actually Drives Cost | Typical Leaks I Hunt | Fast Countermoves I Use |
|---|---|---|---|
| Design & DFM | Scrap %, station count, die complexity | Tight tolerances with no function, odd hole sizes, weak carriers | Rotate blanks, standard punches, bend radii ≥ t, remove cosmetics, mark CTQs |
| Material & Gauge | Coil price, formability, finish, tool wear | Over-strong grade, too-thick gauge, wrong coating | Drop gauge with ribs, pick total-cost metal, match coil width to pitch |
| Batches & OEE | Setup minutes, coil swaps, planning | Overproduction, long changeovers, poor kitting | SMED kits, family scheduling, first-off standards |
| Quality & Packaging | COPQ, detection timing, transit damage | Late detection, burr creep, crushed cartons | In-die sensors, SPC on CTQs, export-grade packs, ISTA checks |

Design Optimization: How Smart Engineering Cuts Material Waste and Tooling Costs?
Unnecessary bends, knife-edge corners, and random reliefs become scrap and downtime. I learned this on a rush job that looked fine on CAD and bled money at the press.
I fix cost at the drawing: reduce scrap area, simplify bends, right-size tolerances, and choose features that suit progressive dies. Early redlines beat late tooling “fixes” every time.

Practical DFM moves before you send an RFQ
I begin with function, not habit. I mark CTQs on the print. I remove cosmetic features on hidden faces. I swap odd hole sizes for catalog punches. I relocate pierce steps before forming when location matters. I pick bend radii that protect material and tool. I check carrier strength and pilot pitch. I rotate the blank to improve yield. I match coil width to strip pitch to cut side trim. When process choice is unclear, I line up the geometry with our neutral write-up on progressive vs. deep draw stamping and we decide with part risk and demand in view. If tolerance relaxations make sense, I frame them under risk-based thinking in ISO 9001 and I hold revisions in the control plan so a later PPAP under IATF 16949 stays clean.
Tolerance impact in plain numbers
| Feature | What Function Needs | Cost-Safe Tolerance | If You Tighten Without Need |
|---|---|---|---|
| Hole Ø (clearance) | Screw clearance, not press fit | ±0.10–0.20 mm | Frequent sharpening, slower SPM |
| Bend angle | Fit in assembly | ±1° | Springback chase and re-bend |
| Flatness | Mounting plane | 0.15–0.30 mm per 100 mm | Extra leveling or scrap |
| Slot position | Locator | ±0.10 mm | Compound station, lower yield |
| Burr height | Safety and fit | ≤0.08 mm | Secondary deburr and claims |
Tooling choices that match the job
I spec D2/SKD11 for general pierce/form. I move to DC53 for small, high-wear punches. I use PM-M4 or carbide inserts when abrasion or life targets demand it. I start clearances around 8–12% of stock thickness per side for low-carbon steel, 12–16% for stainless, and 6–10% for aluminum, then I tune using burr height and edge quality at the press. For tonnage, I trust the simple rule you can see at Dayton Rogers and cross-check with the tech notes on AIDA Global. I add a 20–30% safety margin and confirm against the press curve so we do not overload a station.

Material Selection: Choosing the Most Cost-Effective Metals for Stamping?
Metal selection decides half of total cost. Price per kilo is not the whole story. Formability, coating, and thickness drive speed, scrap, and tool life more than most people expect.
I pick metal by total cost per good piece: formability, thickness, die life, and finish. Softer grades and thinner gauges often run faster and last longer, even when $/kg looks higher.
Compare metals with the end in mind
I build a short calculator with coil price, part area, thickness, trim scrap, strokes per minute, press rate, and a die wear allowance. If stiffness is the concern, I try ribs and beads before paying for gauge. If corrosion is the concern, I compare zinc coatings to stainless and check weld and paint next. When a surface matters, I pick a finish that survives the next process. For quick data, I cross-check properties on MatWeb and then record the choice in the RFQ so the print, strip, and quote speak the same language. If you want a photo tour of trade-offs, open our materials and process guide and the stamping parts page.
Balance price with formability and speed
- Low-carbon steel runs fast and forgives small sins. It is ideal for brackets, covers, and light housings.
- HSLA steel gives strength where stiffness matters; I often drop gauge and add a rib to keep weight and cost down.
- Aluminum 5xxx/3xxx cuts weight and ships cheaper; I tune radii, lube, and over-bend to manage springback.
- Stainless 304/430 protects against corrosion; I keep tools sharp and lube clean to limit work-hardening and burrs.
- Copper/brass make sense for conductive parts; I watch friction and burr.
| Family | Typical Yield (MPa) | Elongation (%) | Relative Price | Practical Note |
|---|---|---|---|---|
| Low-carbon steel | 140–260 | 25–35 | $ | Best general choice for progressive |
| HSLA | 300–500 | 15–25 | $$ | Pair with geometry to drop gauge |
| 5052-H32 Al | ~200 | 12–18 | $$$ | Plan over-bend and clean lube |
| SUS304 | ~215 | ~40 | $$$$ | Watch tool wear and heat |
| C2680 Brass | 200–250 | 30–40 | $$$$ | Burr control is key |

Gauge optimization without fear
A small thickness change can unlock a faster press and a cheaper carton. I size the risk first. I run a simple stiffness check. I add ribs if needed. I run a short transport test to confirm the pack survives. When a buyer needs formal alignment, I log the change under ISO 9001 and, if the project is automotive, I mirror the documents used in IATF 16949 so the PPAP later does not stall.
Batch Size and Production Efficiency: Small vs. Large Volume Manufacturing?
Big batches look cheap on paper. They hide inventory, date codes, and late change pain. Tiny batches burn time in setup. The best batch size balances setup with flow and demand.
I cut changeover time with SMED, then I right-size batches with simple math and schedule for OEE. Stable flow beats big stacks every time.

Where the minutes go and how I win them back
I film every changeover. I split steps into internal (press stopped) and external (press running). I push everything possible into external time. I standardize clamps, shims, and sensor settings. I stage the next die and coil. I mark torque points at hand level. I post first-off photos so operators do not guess. Changeover minutes fall. Economic batch size falls. We run closer to pull. We carry less risk. If you want the basic playbook in one page, the definition of SMED at Lean Enterprise Institute is clear, and I plan lines with the calculation steps from OEE.com.
| Press | Setup Before | Setup After | Batch Before | Batch After | What we changed |
|---|---|---|---|---|---|
| 110-ton progressive | 90 min | 35 min | 20,000 | 8,000 | Standard clamps, preset sensors, kit carts |
| 200-ton transfer | 180 min | 75 min | 12,000 | 5,000 | Pre-stage dies, quick-connect lube, coil ready |
| 60-ton hand-fed | 45 min | 20 min | 5,000 | 2,000 | Color-coded shims, single-minute bolts |

Progressive, transfer, or stage tooling?
- Progressive die suits steady medium-to-high volumes; higher upfront cost, low per-part, minimal handling.
- Transfer die suits large parts and deep draws; high upfront, fewer station conflicts, slower than progressive.
- Stage/hand-fed suits low volume and prototypes; low upfront, high per-part, more handling.
If you are weighing options, the photos and trade-offs in our process comparison help you choose before you lock tooling. For service scope and ready examples, the Metal Stamping Parts hub stays up to date.
Quality Assurance: Why Preventing Defects Saves More Than Fixing Them?
I used to think sorting was cheaper than prevention. Then a burr issue hit thousands of parts. The sort bill alone could have paid for a vision cell and in-die sensors.
Prevention wins. I build checks into the process, run SPC on two CTQs, add mistake-proofing, and treat packaging as part of quality. Early detection beats weekend sorting.

Simple in-process controls that hold the line
I pick two or three CTQs for each part. I add them to a control plan. I run a short capability check at start. I set control limits from that data. I add an action line inside the spec. If the trend hits the action line, we stop and fix. I keep the chart at the press, not in an office. For sampling, I use the lot tables that incoming inspectors already know on ASQ Z1.4. For control charts and rules, the free NIST e-Handbook is clear. When a job needs formal proof, I scale documents to fit and prepare what a PPAP under IATF 16949 expects.
| CTQ | Method | Frequency | Action Limit I Use |
|---|---|---|---|
| Bend angle | Digital protractor | First-off, 30 min | ±1° trend from target |
| Hole position | Optical gauge | First-off, hourly | ±0.10 mm trend |
| Burr height | Comparator | First-off, hourly | >0.08 mm |
| Surface | Visual standard | First-off, shift end | Major defect = stop |
Packaging is part of quality, not an afterthought
Good parts can die in bad cartons. I set pack counts around truck space and buyer pull. I use double-wall cartons for sea routes. I add foam corner posts for sharp edges. I bring in VCI only when rust risk is real. I validate with simple drop and vibration checks aligned to the test series listed on ISTA procedures. I print two-side labels with part number, revision, heat number, die ID, and pack date so receiving scans fast.

Real Cost Models You Can Copy Today
Opinions slow teams. Numbers move them. I use two short models during quotes and design reviews. They are simple by design so the big levers stand out fast.
Model 1 estimates cost per good piece from material, setup, speed, and quality. Model 2 compares two metals by total cost with speed, scrap, and tool life included.
Model 1 — Cost per good piece (plain version)
I collect coil $/kg, part area, density, thickness, expected trim scrap, SPM, press rate, batch size, and a small allowance for inspection and rework. Then:[Cost_{part} = Material + \frac{Setup\ Cost}{Batch} + \frac{Cycle\ Time}{SPM}\times Press\ Rate + Quality\ Allowance]
I run it twice: current drawing and a DFM variant. When a 90° rotation or a 0.2 mm gauge drop reveals a double-digit gap, the decision writes itself. If someone questions line choice, I use the clean definitions and examples on OEE.com so we line up on throughput, not seat-of-the-pants claims.
Model 2 — Material comparison that includes reality
I calculate:Delta Cost = \Delta Material + \Delta Time + \Delta Scrap + \Delta Tool\ Life
Tool life hides money. I convert strokes-per-sharpen and sharpening time into $/part. I include die insert cost if a new grade needs tougher steel. I add any finish step saved by a coating change. For properties, I cross-check on MatWeb and attach the data to the quote so purchasing, quality, and engineering can agree fast.
Packaging and Logistics as Cost Control
Many projects lose money after the press. Dents, rust, and rub marks kill margin and trust. Packaging is a process step like piercing or bending.
I use export-grade cartons, right dunnage, and VCI only when risk is real; I validate with ISTA-style checks; I print clear labels and lock pack counts. Claims fall and booking speeds up.

Export-ready practices that survive long routes
I fix pack counts to match truck space and buyer pull. I pick carton grade by route and load. I add corner posts for sharp edges. I lock a photo of the final pack in the control plan so crews do not improvise when busy. I run a quick drop and vibration set patterned after the series on the ISTA procedures page, then I keep a one-page report with photos in the lot file. If you want a spec written in your format, send a note through our contact page and I will draft a simple plan that your receiving team will like.
Supplier Collaboration and RFQ Workflow That Prevents Cost Creep
I do not wait for surprises after tool build. I prevent them during RFQ. I ask for the native CAD, the print with CTQs marked, the annual volume by month, the packaging target, the finish callouts, and any test or compliance needs up front. I attach a strip layout snapshot to the quote so you see carrier strategy, pitch, and coil width. If you require formalities, I state PPAP depth to match IATF 16949 and keep general quality under ISO 9001. I collect all this through the Prime contact form. If you want to browse examples first, the Metal Stamping Parts hub and the long buyer’s guide are good starting points.
Frequently Asked Questions (for Buyers and Engineers)

1) What is the fastest way to reduce stamping cost without hurting quality?
Fix the drawing first. Remove non-functional features. Relax non-CTQ tolerances. Align features with feed direction. Ask for a strip layout mockup when you send the RFQ through our contact page. If you want to see common trade-offs in pictures, scan the stamping parts page.
2) How do I choose between progressive, transfer, and stage tooling?
Choose progressive for steady medium-to-high volumes, transfer for large or deep draws, and stage for low volume or prototypes. The pros and cons with photos sit in our process comparison.
3) How do I estimate material utilization fast?
Utilization ≈ (part area × parts per pitch) ÷ (coil width × pitch). Improve it by rotating the blank, sharing webs, and matching coil width to pitch. I show working examples on the stamping parts page.
4) My print calls for tight flatness. Can I relax it safely?
Ask which surface mates in assembly and what gap matters. If function allows, set flatness per 100 mm and log the risk under the ISO 9001 framework so incoming inspection and any PPAP under IATF 16949 stay aligned.
5) Does a higher alloy always cost more per part?
Not always. A more formable grade may run faster, scrap less, and extend die life. I shortlist options using our materials guide and confirm properties on MatWeb.
6) When should I drop gauge?
Drop gauge when stiffness can come from geometry. Add a rib or bead. Validate with a quick stiffness test and a transport trial. If you want a formal pack spec, I draft it and send it back via our contact page.
7) How do I control springback on aluminum and HSLA?
Use larger bend radii, steady lube, and planned over-bend; place bends late in the strip. If you want to see why order matters, the examples in our sourcing guide are helpful.
8) What files should I send for a fast quote?
Send native CAD, the print with CTQs marked, expected volume, packaging needs, and finish specs. If you expect PPAP, state the level up front so we match IATF 16949. For general quality terms, we follow ISO 9001.
9) How can I cut changeover time without big spending?
Start with SMED basics. Move tasks outside downtime. Standardize clamps and shims. Pre-stage the next die and coil. Use a photo-based first-off. The one-page definition of SMED is a good refresher.
10) How do I stop burrs from creeping up late in a run?
Track strokes-per-sharpen, inspect burr height hourly, set an action limit, and clear slugs with air. For chart rules and capability, the NIST e-Handbook is practical and free.
Conclusion
Smart design, the right metal, fast changeovers, and in-process quality remove cost without pain. I use these four levers every day. They work on any shop floor when we keep them simple and visible.